![]()
Week 01 – Maya Modeling Techniques – Barrels
Everyone needs to make Barrels
Form and Structure of 3D Objects
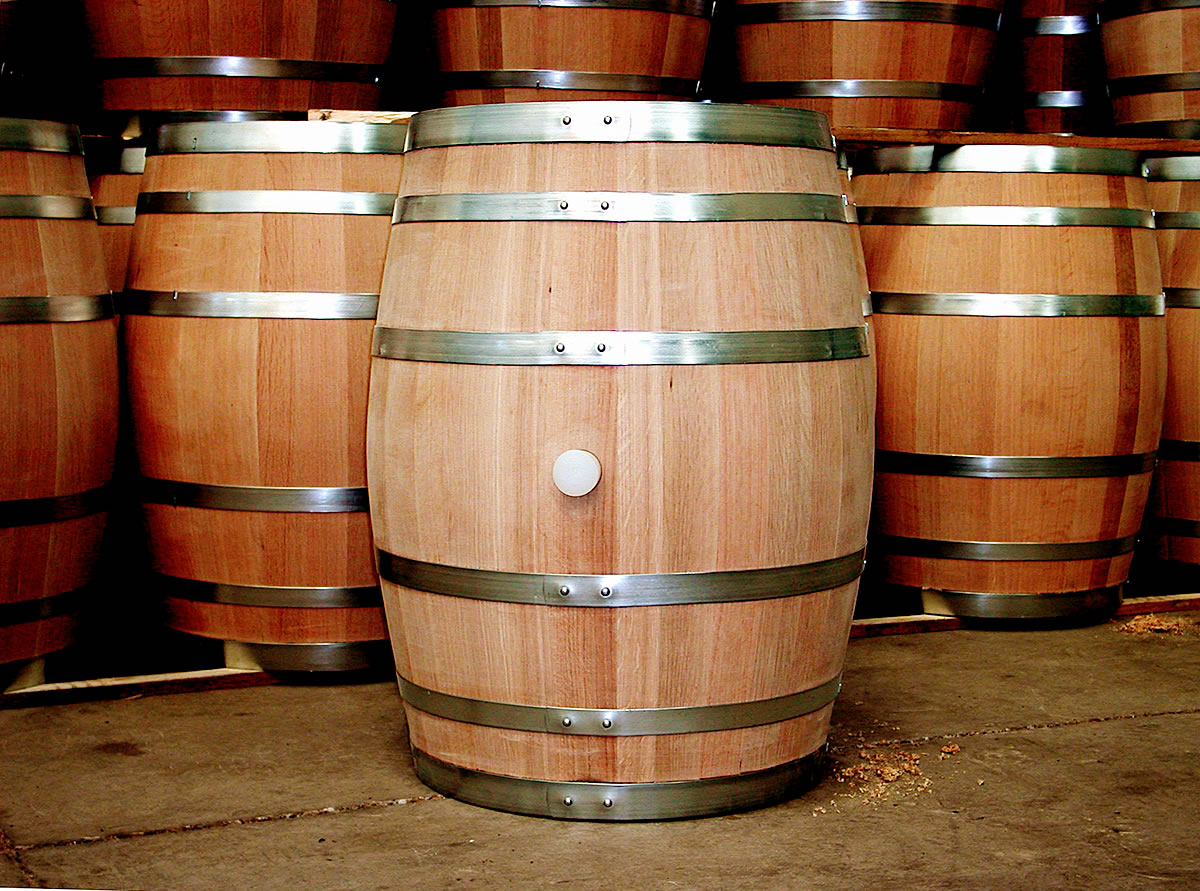
All objects have form and structure. Understanding how to represent that form and structure with vertices, edges and faces is the job of a Modeler. Look at the picture of the barrel, how was it constructed? How can we construct this object in 3D? All 3D forms can be described with three elements:
Cross-section
A single slice through the object represents the shape and form. The cross-section should be through the smallest of the length, width or height of the object.
You can visualize most cross-sections if you imagine slicing the object in half. What does the section you sliced look like? Think about the shape of a slice of bread. Note we don’t slice through the length of the bread to find the cross-section.
For the barrel, the cross-section is a circle – the shape that can be seen from the top.

Length
The length that the cross-section follows. The length should be the longest part of the object. For the barrel, this is a line representing the height from the bottom to the top, through the center.
Form Lines
The form lines describe the cross-sections as they travel along the length of the object. For the barrel, this is the curve we see on the outside edges. It visually represents the object’s change in cross-section. This is the shape that most people will identify as the barrel.
What about the Barrel straps?
Cross-section – this is a rectangle. If you sliced through the height of the strap (shortest part)
Length – the circle around the barrel – The cross-section follows this curve
Form Lines – This is the outside edge of the strap- it is a line with a bit of an angel – but an important angle as it follows the form of the barrel as it rests on its surface.
What 3 basic shapes are things made of?
You can simplify most 3D objects down to Boxes, Cylinders and Spheres. Take a look around at real world objects. Where do you see these shapes and structures in an object’s form? How are they joined together? What shapes are hidden? How are parts of these shapes joined together to create complex shapes and forms?
Introduction to Maya Videos

Maya Intro 01 – Setting up a Project Folder
Maya Intro 02 – Interface and Creating Objects
Maya Intro 03 – Editing vertices, edges and faces
Maya Intro 04 – Extruding Edges and Adding Edge Loops to Create Details
Maya Intro 05 – Helix Primitive, adding Cones, and Snap Aligning Objects
Maya Intro 06 – Hexagon, Beveling and Mirroring Objects
Maya Intro 07 – Saving Files to a Project
Maya Intro 08 – Moving the Pivot and Snap Align Objects
Maya Intro 09 – Snap Together to align objects polygons to other objects
Maya Intro 10 – Avoiding shimmering polygons by modeling
Creation of a Barrel – 5 ways
We will create five 3D barrels in Maya using a variety of tools. This will help us quickly understand that there are many ways to create 3D models. Each of these techniques when used in combination with one another provides an artist with a toolset that allows the creation of many complex 3D forms.
#1 – Scaling Edges (or Vertices)
Moving, rotating and scaling vertices, edges and faces is the foundation of modeling. The majority of your modeling time will be spent doing this task. A great modeler is able to efficiently and quickly create the form of an object by manipulating these components.
Create a cylinder, move vertices row by row to create the shape. Finish the model by selecting the top faces and extruding in and down.
Maya techniques to know:
Right-click on an object to select vertices, edges or faces
Shift + Right Click to modify vertices, edges or faces – ie. Extrude, Bevel
TAB + drag on an object to visually select the components you want to select

#2 – Soft Selection
Instead of manually moving components it is often easier to move a group of faces with a nice soft falloff curve. Soft selection allows you to move the components closest to the center of a brush the most, and the components at the edge of the brush the least. This is great to add soft rolling curves to a model. Note you can change the fall-off curve to make all types of custom shapes.
In Class Project: Create a cylinder, select the middle row of vertices. Hold B and the middle mouse button to adjust the area of influence (brush size). for and B+mmb to increase soft selection and scale to create the shape, Select top faces, Extrude top

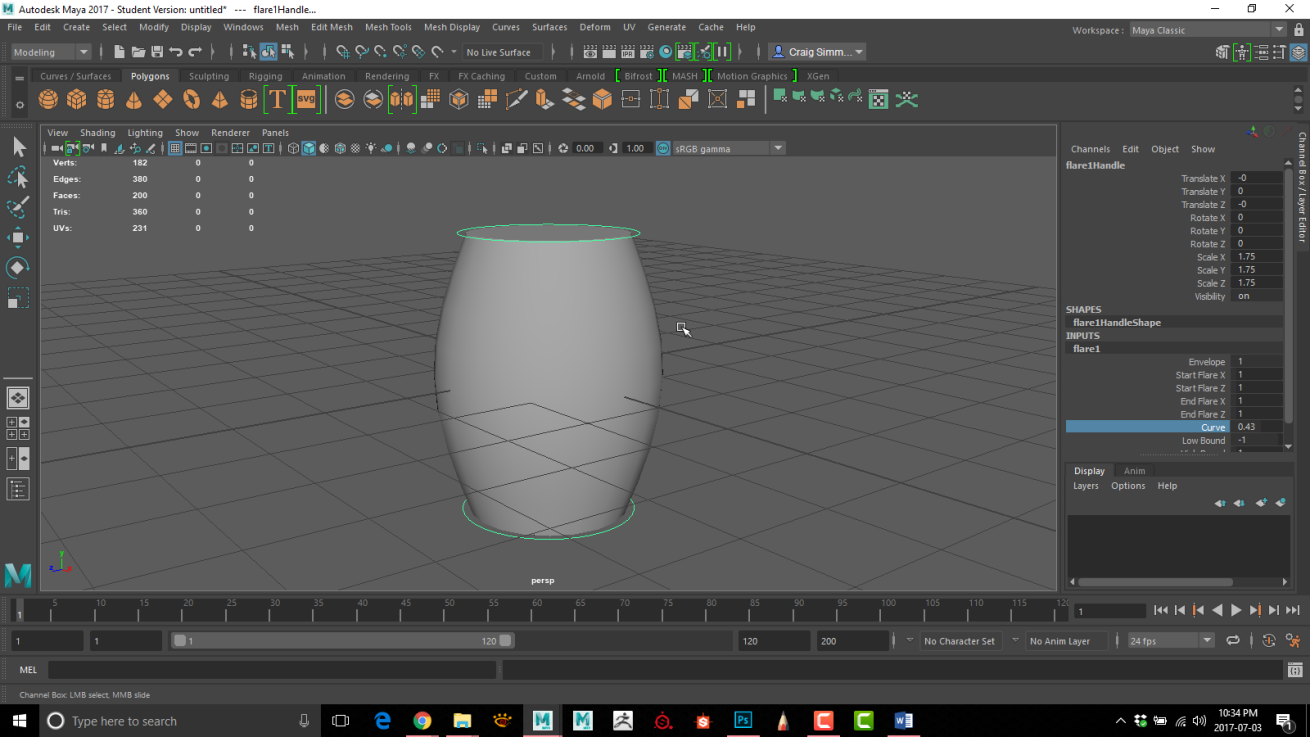
#3 – Nonlinear Flare Deformer
The nonlinear deformers (Bend, Flare, Sine, Squash, Twist, Wave) allow you to deform objects or a component selection. Flare is particularly useful for adding gentle curves to an object.
In-Class Project: Create a cylinder, add height subdivisions, select all the inside vertices (not the top or bottom), Deform, Nonlinear, Flare to add a Flare deformer. Adjust the curve amount of the flare deformer to create the bulge of the barrel. To create the barrel straps, Insert edge loops where the bands should be, select the faces for the bands, shift + right-click, extrude. Finish the barrel by extruding the top and bottom faces. Extrude in, extrude down.
#4 – Surface of Revolution
Any object that is perfectly symmetrical around its center can be created with revolution. Glasses, bottles, test tubes, pepper mills, coffee cups, bowls and barrels are easily created by revolving a profile shape. The profile is the profile from line (curve) starting at the center of the object. Think of it as ½ of the outline of an object the way you would draw it.
In-Class Project: Create, CV Curve options, change to linear, Create the profile shape of the barrel in the front view. Start the first point at the top center of the barrel. Surface, revolution options, change to polygons, control points.

#5 – Creating an object with multiple pieces of geometry
In real life, objects are constructed from multiple parts. Very few objects are a single solid piece. We should model our objects the same way in 3D. Think about how objects are constructed and how they have different materials and textures. Where an object is made of a different texture or material – that should typically be a different object in 3D. For the barrel, we would model each plank to create the barrel. Planks cut into a circle for the top and bottom. Each strap would be a separate object. Even the rivets would be separate.
In-Class Project: Create a thin box (single plank of the barrel), duplicate special to create 12, Select all of the planks, Deform, nonlinear, Bend, add two cylinders for the bands, create a top cylinder. Cut cylinder into pieces through Multicut, extrude planks.

How to Submit your homework to Teams

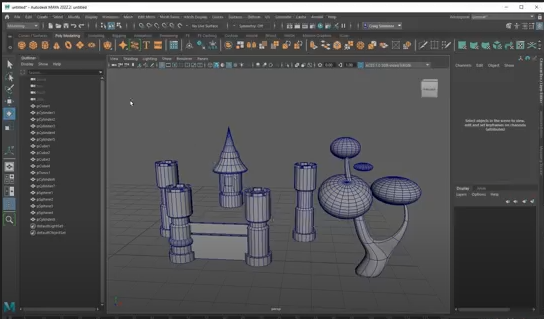
How to Create a Basic Castle
Rendering and Presentation – We’ll cover this next week.
Why do we need to render our model for people to see? Presentation is always the key to getting people to enjoy or pay for your work. Rendering is the way we add lights, shadows, colours and textures to a scene. Even from the beginning, you should be working on how your lights interact to best showcase your models.
Assigning Arnold Materials and Lighting:
Right-click on an object, Assign New Material, Arnold, Shader, aiStandardSurface
Creating a ground plane to receive shadows and present your models
Don’t use a plane – as it can often be seen in the renders and looks unprofessional. Use a curved plane or a flat cylinder.
Creating lights to cast shadows:
Create, Lights, Point, Spot or Arnold, Lights, Area or Skydome. You can use lights to showcase your models.
Rendering your scene:
Open up the render options.Choose the file type (.png or .exr are good). Choose the resolution (HD 1920×1080 is a great start). In the Arnold settings, change the Camera(AA) to 5 for a production render.
Techniques to master
- Create primitives and adjust attribute values in the channel box
- Selection of components – Right-click and hold – select face, edge or vertex
- Move (W) – Rotate (E) – Scale (R) (objects, faces, vertices)
- Extrude Faces to build shapes (Ctrl + E) or (Shift + Right Click, Extrude)
*** Extruding edges often leads to trouble, avoid like the plague or COVID-19
- Insert Edge Loops to add even detail around an entire object (Shift + Right Click, Insert Edge Loop)
- Multi-Cut Tool to add localized detail (Shift, Right Click, Multicut)
- Assign Basic Arnold Materials (Shift, Right Click, Assign New Material – Choose the Arnold Standard Shader (aiStandardSurface)
- Add Lights – Create, Lights, Spot or point. More realistic lighting: Arnold Menu, Lights, Area and Skydome, Render
- Edit, Delete by Type, History – to delete all the Maya modeling nodes
- Fill Hole – to close an opening – Double click the edge to select the opening, Shift+Right Click, Fill Hole.
- Mesh, Cleanup – Used to fix missing or problem geometry. Reset options, scroll to bottom and turn on the top 3 check-boxes.
- Mesh, Combine – Join multiple objects into one – only use if absolutely necessary
- Merge Vertices – fuse multiple vertices into one – to reduce detail – Shift, Right Click, Merge Vertices, Merge to Center or Merge Vertices to merge within a distance
- Bevel Edges – to add a sharp or round edge to an object – usually for lighting and making it more realistic – Select an edge loop, Shift+right click, Bevel Edge
- Bridge – join faces or edges together quickly – Select two faces, Shift+Right click, Bridge
- Collapse – remove edges or faces by joining the surrounding edges together. Select an edge, Shift + Right-click, Collapse.
- Mesh Tools, Create Polygon – make a new polygon (counterclockwise or it will be inside out)
- Snap to points (hold v), grid (hold x), curves (hold c)
- Edit, Duplicate Special – to create arrays of objects or to make instances
- Create, Curve, CV Curve – Drawing curves to use as a reference
- Create, Free Image Plane – To Add image planes to model in proportion
- Edit, Freeze Transformations – to reset the translation, rotation or scale of an object
- Moving the pivot point of an object – hold the ‘d’ key while moving, rotating or scaling
- Modify, Snap together tool – select a face on the object to move and a face on the object to move the first to. Hit enter and it will snap in place.
- To Scale on 2 axis – CTRL click on an axis will scale the other two
- Use average vertices to make a square verts round. Select 8 square vertices (4 corners and 2 middle), then average vertices will make them a circular shape.
Modeling is Easy – Form, Proportion, Scale and Appeal are Hard
Find the length of an object – a line of action that runs through it (not all objects are like this), then make sure all the lines that follow the topology of this object. Topology will run parallel to the length (profile).
Separate pieces based on the material
Keep pieces separate for ease of construction – and to mimic the way things are built in life
Join pieces together when it makes sense – to conserve polygons, to make it easier to build
Strategies for Modeling 3D Objects
- Extrusion / Box modeling – start with the basic shape – add loops, cut edges and extrude to find the form. Add details last – get the form and volume right to begin with.
- Surface of Revolution (rotational or lathe modeling). Build a profile and revolve to make a 360 model – anything uniformly round – bottles, glasses, light bulbs, etc…
- Extrusion/Extrusion on a curve – tentacles, cables, etc…
- Deformers – Bend, Flare, Lattice, Wire
- Build with correct topology and deform into the shape – tires, cables/ropes, gentle curved objects, tubes. Use the deformers or just move the edges/verts as needed. Use curves as necessary to match the profile you want.
- Loft – create profiles and loft between them to get the shape – think of a boat hull or plane
- Kit Bashing – jam primitives/other objects together and build the missing pieces – ie fix it
- Arrays of objects – duplicate and repeat – tires/wheels, fan blades, etc…
- Model half (or less) and duplicate to make the full piece – repetition – see #8 as well – build a small part and repeat to get the whole object
- Biral – especially for mechanical things like cars – create the contour shapes. Create objects piece by piece, panel by panel
- Booleans…Make objects and use them to join, intersect or subtract from each other
- Join objects together without Booleans but with nice clean topology!
Things to consider
How is an object made – what is its history, how is it constructed?
– molded, glued, assembled from pieces, riveted, screwed together, etc…
How will the object be seen and how much detail do you need to create – close up or far away
What can be faked (texture, displacement, bump, normal map) vs. modeled
Conserve, conserve, conserve – model lean and allow the object to be increased at render time. Don’t model things that can’t / won’t be seen.
What you need to know to model anything
- Topology isn’t wireframe lines – it’s lines that follow the shape, contour and form of a surface. Find the form, trace them out with lines/curves/polygons and you will have your object.
- If you create points along the surface of the object and stitch them together you will have your shape
- There are fast ways of creating shortcuts to getting the surface started – primitives, revolution, lofting, birail, etc…
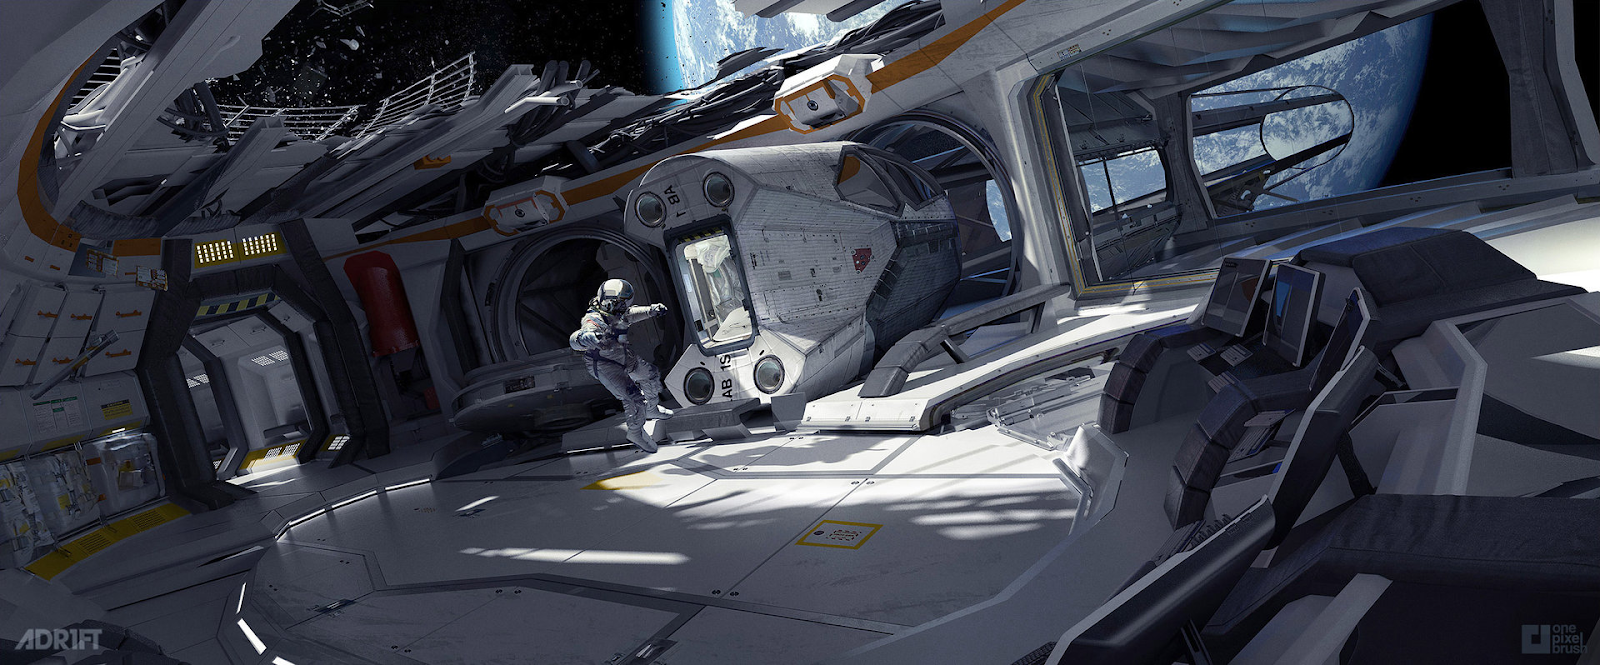
Production Process for Modeling:
A great example of an environment from initial blocking through a number of iterations until the final product is realized. This is an ideal pipeline and process for creating projects and is the secret to successful growth as an artist.
Design
- What is the purpose of the design?
- What mood or statement about the game/film does the environment make?
- How does the environment support the game/film?
- What makes the environment interesting/special from a portfolio/story standpoint?
- How can you make the environment believable?
- Scale, Detail, Lighting, Mood / Emotion. Composition
Blocking *** The most important step for 3D modellers
- Build the objects to real-world scale as quick primitives or blocked out meshes
- Don’t worry about the details, they aren’t important. Size, shape, form and spatial relationships are. This is all about staging and composition.
- Kitbashing is a great way to get the ideas down – reuse parts of models already created
Paint over
- Drop-in a quick light with shadows. Take the blocked image to photoshop and paint over details. This is an iterative process to refine the design. To solidify the ideas before you spend time modeling.
- Modeling is slow. Drawing and painting are quick. Use them to refine and plan your modeling process. Spend time here to make good decisions.
Model and Iterate
- Refine the blocked model. Replace parts with detailed objects. Work on the form and structure of the models.
- Check the reference. Refine. Re-work. Make paint-over studies.
- Continue until the model reaches the necessary quality level.
- Don’t be afraid to put the model away for a day or two and look at it with fresh eyes. Many of us can’t see problems while we are engaged in the task. Take a breather and come back to it. You will see the problems quickly then.
UV Unwrap
- Unwrapping is a science. Treat it as a task to be completed in a timely fashion.
- Check for stretching. Refine the model as needed to make sure the UV’s hold the necessary detail.
- Pack the UV’s as tightly as possible. Don’t waste space.
Material and Texture
- Assign materials. Build up base textures.
- Do another paint-over from a screen capture to see what you need to do to achieve the results expected.
- Drop-in base textures. Add detail maps – dirt, scratches, bumps, etc..
- Create a roughness/spec map to break up the details.
- Create materials based on real-world examples.
Lights and Camera
- Create a camera to frame and compose your scene
- Render from that camera, work from the perspective window
- Create a lighting setup that showcases the models and textures
- Create believable lighting. Catch the edges and highlights.
- Don’t forget about Keys, Fill, Bounce and Rim lights. Use them as needed.
- Reference real-world cinema to see how light plays an important role in creating mood and ambience.
- Render and refine. Go back and adjust materials and textures to build up the depth and interest of the image.
Rinse and Repeat
- It’s all about iterations. Keep adding, changing and adjusting, developing the depth, interest and details towards a finish line.
- Don’t be afraid to experiment, to try new techniques. Happy accidents can lead to interesting results (just ask Bob Ross!)
Render Passes and Comp
- Yay, I’m done. It’s beautifully rendered! Or is it?
- Render the scene in AOV passes
- Bring the passes into your favourite compositing program (after effects, nuke)
- Use the passes to colour grade, experiment, and create a bold vision.
- No commercial 3D images come directly from the renderer. They are always changed/fixed/altered for mood and effect in post.
Presentation
- Show off your work. To friends, family, colleagues
- Put it online. Boast about it. Let people know you are an artist
- Get feedback and critique. Use them to improve upon your next project.
Archive
- Gather all the files you used into a project
- Create production notes to go along with the project so you remember important tasks, settings, etc… if you need to work on the project again. Don’t rely on remembering a month or a year from now what you were doing.
- Save the files in multiple places